Tuesday, August 27, 2013

Queen Cake

Fourth time.  Perfection. 


Some tips:

What worked best for me was a pyrex pie plate with a circle of parchment on the bottom.  My kids do not like blackened, too dark caramel.  This was the best solution.

Yes, get the best butter you can. 

It is truly caramel heaven.  This one was a wee bit darker probably because I topped with some turbinado sugar instead of white. 

Amazing.  Go make it.  Now.


Sunday, August 25, 2013

Kouign Amann Idéal


click here for more perfect

Well, my version of perfect.

Yeah, I couldn't resist making another.  I did a pyrex pie plate -- which was a huge improvement.  Still, a little blacker than I would like on the bottom -- I think next time I will bake on a parchment circle.

Because, oh yes, there will be a next time.  This is too good not to do again -- especially now that I've figured it out.


And it's better - much better at room temperature.  It all gets chewy and interesting -- like if the interior of a  very good sfogliatelle spent the weekend with a few pounds of butter.

click here for part 4

Kouign Amann Part Deux


click here for part 3

click here for part 4

OK, remember how last time, I announced that I didn't care if Kouign Amann ever called again and she wasn't my best friend anymore.  And I would never, ever, ever talk to Kouign Amann and I didn't even want to hear her NAME ever, ever, ever, ever.  Then I stomped off to my room, slammed the door and threw myself on the bed crying??

Yeah, you knew that was crap, right?


Of course it was. 

After Joe and I didn't work out, I was mulling over two recipes:  this one from the Kitchn and one from David Lebovitz.  I decided on David's, it looked less fussy.  I had read so many stories of Breton landladies actually making these in the morning, it resembled a home--rather than a patisserie--version. 

And, thank you Joe, having the sugar against the butter did cause the dough to weep.  I was prepared for that and just pushed through as David's looked like a mess anyway.  A delicious, burnt, buttery mess.

The verdict?  Really wonderful.  Mine burnt a little too much on the bottom and sides -- I followed David's recommendation for a nonstick pan.  Should've gone with my first instinct -- a pyrex pie plate.  Oh, well.

 
Like a big piece of buttery candy. 

ETA:  Now I'm peeling the nonburnt parts off and eating over the sink.  STOP ME FROM EATING THIS THING.  Yes, it's better at room temperature.


click here for part 3

click here for part 4

Saturday, August 17, 2013

Kouign Meh-mah

When I first read about kougin amann on the Joe Pastry website, it was love at first site.

And, no, I've never actually eaten one -- that I can remember.  But when I was a kid, the ultimate in decadence was the butter cake from the local bakery.  Completely different animal -- more of a round sponge cake with brown sugar on top.  I hoped that the kougin amann would deliver the grown-up version.

I was feeling pretty cocky, having survived two laminated dough rounds with Cronuts Part I & 2.  I went out and bought a kitchen scale for the occasion, feeling this was baking with  big boys.  I did not get fancy Euro butter -- didn't have the time -- and just used Land O' Lakes. 

I woke up early, ran some 100m sprint intervals (how'dya think I'm surviving all this butter?), assembled my ingredients and proceeded to beat the hell out of my butter with a rolling pin.

A little too cocky, I'm afraid.  The lamination did not proceed as smoothly as with the cronuts.  I prefer the Daily Meal's method (or write-up), but I think this is a skill that will improve.  It's only my third time, after all.

While waiting for things to take off in the oven, I looked at some other recipes and realized there were some variants.  Baking in muffin tins seemed quite intriguing, to get more caramelization.  But nonetheless, Joe brought me to the party and we were leaving together.

Which was a mistake.  Sometimes it doesn't pay to be a good girl. 

Because after 25 minutes, they looked like this:


I was hesitant to leave them longer.  So we tried them.  And they were...meh. 

The best parts were the browned, burned parts.  And after reading a bunch of other recipes, that had them to bake slowly for about 45 minutes. .....I decided to put them back in the oven (I'm sure this is destroying some subtle chemical reaction) and got this after ANOTHER 25 minutes.


Huge improvement.  Huge.  Maybe it's just my stove, Joe probably has some amazing Viking thing. 

And.....not sure I would make them again.  Although I was committed to my cronut endeavors, this didn't have enough appeal for me to work again.  I think the boys would be far more thrilled if I took that laminated dough and made croissants -- preferably with a hunk of chocolate in the middle.

Thursday, August 15, 2013

CRONUTS: BOW TO YOUR SENSEI

I did it!


The little cutter was key.  I used this one

There were some small caveats:


  • I think I got TOO much rise.  Which is fine, rise is great.  But not all of them were perfect.  Many resembled the sand worms from Dune.  Delicious, but odd.
  • The donut holes totally looked like the sandworms.  I put cinnamon on them too to celebrate.
 
 
  • Lastly, I did fill with the lemon curd - but that seemed pointless.  They were so tiny, with the tiny cutter not much landed in a cronut.  A bit of lily gilding (and I am all for gilded lillies) that I would pass on.  At home, you can serve any cream on the side.  

Sunday, August 11, 2013

CRONUTS! YOU AND I HAVE UNFINISHED BUSINESS


After this week's cronut experiment, I licked my wounds and decided to study further.  I have ordered a tiny donut cutter and a Bismarck tip.  Also, from my initial foray, decided to step away from the pastry cream--finding it far too eggy/heavy with the fried/crisp--and try something different.

Now, never having eaten an authentic cronut, I can get the pastry cream idea.  These are not big things.  People get one, probably to share.  It's okay if it hits a little heavy.

Me, I'm making these.  I'll have a dozen in my clutches. After all, I only learned to cook so I could eat expensive food in roadside diner proportions without having to get a better job. A tablespoon of foie gras?  Je pense que non!

Besides, this is Jersey.

So after an intense text conversation with Miss Texas and some serious study of my new favorite website, Joe Pastry, I decided on the following options to taste:


All of these had a whipping cream base.  The only one not pictured is a jar of Trader Joe's cherry preserves.

In preparation for my next cronut battle, I decided to spar with this donut recipe from Epicurious, via the Flour Bakery in Boston, and was oh so careful with the frying temps and cut them out so VERY LITTLE. 


I glazed one in chocolate ganache and the other in a thin confectioner's sugar glaze.

After dinner, each judge received a vanilla and a chocolate and a selection of creams.  I decided not to fill, to allow the most combinations and flexibility.

Mother's Favorite:  Mascarpone with Cherry Preserves

The overall winner was LEMON CURD (lemon curd + whipped cream).  Followed by MASCARPONE plus CHERRY PRESERVES.  The glazes did not make much of a difference.

I will be avenged, cronuts.  I look forward to meeting you again in battle.

Friday, August 9, 2013

Cronut Experiment


My beloved children are VERY GOOD about going into the Big City with Mommy to try new food.  We’ve done Donut Plant and fancy popsicles and crack pie even!  But with the people lining up at 5 a.m. and publicists shanking each other in alleyways, our chances of getting one of Dominique Ansels’ cronuts this year are slim. 

ShopRite!
ShopRite is getting into the cronut action --  “Croissant Donuts.” Not bad and pretty good for a grocery store.  Good for you, ShopRite. 

But Mummy can always cook….

I found this recipe for cronuts from the Daily Meal.  Looked pretty good.  However, the recipe was rather underwritten and thin in parts.  There were some steps I could’ve used some more information on  – I’m going to go over those points here.


You have to mash the butter into a block 8 x 8” between parchment sheets.  I had the bright idea of putting into the freezer so I could peel off the parchment.  It worked out great.


Pastry cream, not scambled eggs


Pastry Cream.  I don’t make pastry cream often.  Maybe every other year.  This recipe was a little underwritten for such a delicate emulsion.  I forgot all the tricks.  I threw out the first batch and used this recipe from Epicurious – after thoroughly reading the comments and remembering to temper the egg mixture first, etc.  Next time, I’ll probably dig out Julia Child’s recipe.


So after all the rises, the final roll out instructs “cut out 12 donuts” from a 6 x 8” rectangle.  Huh?  I really couldn’t picture how to do that.  So I used a small glass.  DIdn’t know what to do for the interior, because all my bottle caps, etc, were way too big for an interior hole.  So I threaded a straw through. 
THAT WAS A BIG MISTAKE.
I also didn’t want to handle the dough too much at that point, so I didn’t want to mess with it too much.  (I should’ve messed with it a little)


They fried up beautifully.  I even measured the temperature of the oil and set a timer for each donut.  Also:  THIS is when you roll in sugar, not the end when they are cooled.
Put the pastry cream in, glazed the top, took a bite – and some were raw inside.  RAW INSIDES.  Hole not big enough.  Not the right size.   Dough too dense, and fries too quickly.  Aaaarrrgghh.

The taste?  The surviving parts and others?  Lovely.  I had some leftovers that I just shaped into circles and those fried up gorgeous.  The pastry cream was a little heavy for my taste.  It reminded me a little of Krispy Kremes with the icing – which always strikes me as a little much.  I think with a lighter cream or an orange glaze, we’d be a little closer to God with these.
I think if I made these again , I would invest in a proper donut cutter to get the dimensions exactly right.  And then an orange blossom cream.

Monday, April 1, 2013

Extra Creamy Coconut Pie Recipe


Was looking for an eggy coconut pie recipe and this is it. Condensed milk plus eggs makes it very flan-like. I have to post it here otherwise I will lose this recipe to the mysteries of the Internets:

Shirleyoma, this is just wonderful. Silly me, I forgot the butter addition and it was still great. I also saved my egg whites to make meringue

Ingredients

  • 1 (9 inch) pie crust, baked                                                 
  • 2/3 cup white sugar
  • 1/2 teaspoon salt
  • 3 tablespoons cornstarch
  • 4 teaspoons AP flour
  • 1 2/3 cups milk (or half-and-half)
  • 14 oz can evaporated milk
  • 1-1/2 cups shredded coconut
  • 3 egg yolks, beaten  (save your egg whites for meringue)                                              
  • 4 teaspoons butter
  • 1- 1/2 teaspoons vanilla

How to make it
  • In a medium saucepan, combine sugar, salt, cornstarch, and flour. Gradually stir in milk, evaporated milk, and coconut. Cook over low heat, stirring constantly, until mixture comes to a boil. Boil 1 minute, continuing to stir. Remove from heat.
  • Place egg yolks in a medium bowl. Slowly pour 1 cup of milk mixture into egg yolks, whisking constantly. Whisk egg yolk mixture back into remaining milk mixture in saucepan.
  • Return mixture to heat. Bring to a boil, then boil for one minute, stirring constantly. Remove from heat. Stir in butter or margarine and vanilla extract.
  • Pour mixture into baked pastry shell. Chill at least 3 hours before serving.


Meringue

Take egg whites, a pinch or two of Cream of Tartar, and 2 tbsps of white sugar.  Beat mercilessly in a Kitchen Aid with the whisk attachment.  Pipe onto top of cake and bake in 375 degree oven for 10-15 minutes -- watching carefully until the right shade of golden brown.

Monday, March 25, 2013

Chicken Paprikash

True story:  I spent days eating this and then spent a full fifteen minutes this morning wondering why I gained four pounds.


I had forgotten all about chicken paprikash (can you believe that?) until my friend MK reminded me. THANKS MK. Thanks, MK, for the four pounds and reminding me of another use for sour cream. 

My grandmother made a version of chicken paprikash, with a lot less spice.  And much more cream. I don't know if that was a preference, a reflection of the availability of cream, the expense of spice or a regional quirk. It was made with an eggy spaetzel (called nokedli in Magyar).

I liked this recipe very much from A Full Measure of Happiness. It felt closer to my version of authentic, without strange peppers and whatnot. 


Chicken Paprikash (serves 6-8 people)
  • 2 lbs chicken (traditionally, you would use drumsticks and thighs. I used drumsticks and a big, fat, chicken breast to health it up a little)
  • 1 large or two small onions
  • 2-3 T paprika
  • salt and pepper
  • 6 C water or chicken stock -- or a combination
  • 1/4 C flour
  • Sour cream
For the nokedli
  • 6 eggs
  • 2 C flour
  • 1 t salt
  • 1 t baking powder

1.  Cover chicken parts with paprika.  Brown in a big sturdy dutch oven.

2.   Toss in diced onions, brown slightly.

3.  I added chicken stock.  Simmer, simmer, simmer for a couple hours til the meat falls off the bone.


4.  Now, this is where I differed from Full Measure of Happiness. I separated the meat/bone from the liquid, picked off the meat to return to the pot AND poured all the liquid through a fat separator. Not to save calories -- but reducing the amount of fat will increase the flavor intensity of the sauce.


5.  Simmer, simmer, simmer.  Thicken with flour/water  OR potato starch and water.

6.  For the nokedli,  combine all the ingredients  and drop by the spoonful into a pot of boiling water until the noodles float.  Remove with a slotted spoon. You may need a few rounds.

7.  Serve this lovely chicken stew over a big scoop of nokedli with a dollop of sour cream. I used to mix the sour cream in -- until I was informed that not everyone likes sour cream. I know, a day without sour cream is like a day without sunshine. I don't understand it either. 
 
And, man, did this get me like a punch straight to the heart. One million memories. I think it's absolutely wonderful.  My husband described it as a "Big Bowl of Awesome."  But me, I wasn't quite sure if I was tasting the food or the nostalgia.  

I don't know if this is authentic, but it's authentic to me. 


Saturday, March 23, 2013

Red Eye Gravy

The food of rural Texas (AKA my childhood) is all about making do with what you have. Long before all this "reduce, reuse, recycle" stuff, using up or going without has been bred into us native Texans for generations. If your family helped settle this land, you have genes that are resourceful and dare I say, "frugal" would be the nice word.

Chances are your grandpappy and mammy were at some point snowed in, surrounded by injuns (in the case of my paternal great-great-great-great Uncle Tapley, Santa Anna's men down to the Alamo) or otherwise cut off from outside resources. Or just flat broke. So they used what they had. And every bit of it.

In the spirit of using whatever you have handy to your best advantage, I present Red Eye Gravy. As simple a recipe as you can get, Red Eye Gravy is what I could call an acquired taste. It was my father who always made it, and my brother who waited anxiously by the stove. I'm not a huge fan, but there's no doubt that its origins lie south of the Mason-Dixon and it's "use it up" qualities make it a Texas staple.

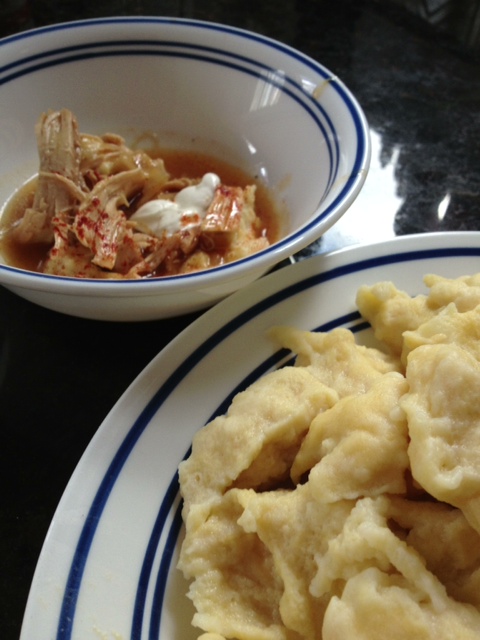
Red Eye Gravy is so named because of its deep red color, although its consistency makes it more of a sauce than a gravy. It's very thin and contains no thickening agents, so don't expect creamy. Serve it over biscuits and pieces of pan seared ham. Some people like to add a fried egg or two.

Start with a ham. Please do not substitute bacon just because it's pork. Bacon will yield a greasy mess and likely injure you in the process. I used a ham steak because good Lord, what would I do with an entire ham?

If you have a ham, cut off pieces about 1/8" thick--this is not the time to go deli thin--and 4" squareish. If you have a ham steak, you might want to slice it into two thinner pieces once you have the thing cut up into the 4" chunks. I'd use about 1-1 1/2 pounds.

The technical term for the caramelized bits is "drippings."

Heat a skillet (I used non-stick, but really, it's better if you don't, and I wish I hadn't) and cook the ham pieces over low heat a few minutes on each side until you get a most delightful red. It's important not to add any grease or oil and just as important not to cook the ham too quickly. You're not so much frying as you are coaxing the juice from the ham and hoping that little caramelized bits of fat and juice cling to the pan. See?

Transfer your cooked ham to a plate and get about 1/4 of a cup of coffee. The coffee can be freshly made, hot or cold, but here is where the Old Timers used what they had. Back in the day, people did not pay $5 for a cup of coffee, did not buy coffee in any flavor but STRONG, did not brew fresh every day and sometimes even reheated and drank coffee left over from the previous day. In my 1970's childhood, you made coffee  in a percolator, and you made a lot of it because it was a PITA to assemble the contraption and the stupid thing took so long to make a pot.

But freshly brewed is okay. However, please do not use flavored coffee. Do not use fancy coffee of any kind. I'm talking you should straight up get some Folger's. Trust me on this, even the non-fanciest coffee you already have in your pantry is not right for this recipe. It will taste FUNKY.

Your heat should be low from cooking the ham, but now turn it up to low-medium. Take your plain old I-wouldn't-actually-drink-this coffee and add it to the pan. The pan will bubble and look mildly like a science experiment for a few glorious moments, but never fear, because there is so little grease in the pan, it will not explode or even splatter. Another reason why bacon is verboten here.

Take a spatula and stir to remove the drippings from the pan. When I first mentioned Red Eye Gravy to my friend, Jersey, she was startled by the use of coffee to "deglaze" the pan. Deglaze? It never occurred to me that that this process was deglazing. You're just getting the drippings.

Come on, it's going to get cold.
Anyhoo, stir and scrape and add up to 1/4 cup of water if it seems too dark and let it cook for about two more minutes. It will not thicken. I find the taste a little strong, so you can add a tablespoon of brown or white sugar if you like.

Assemble your plate. You will need biscuits--and again, it matters not if they are fresh or hot or cold. In fact, this is an Old Timer's trick to use up day (or several day) old biscuits. Arrange your ham and biscuits on a plate and pour on your gravy.

Enjoy and rest assured that Uncle Tapley likely ate his fair share of Red Eye Gravy before giving his life for the Republic.


Thursday, March 14, 2013

Falafel, or, More Round Fried Things My Children Will Eat


Falafel has a long history in New York City.  Having worked downtown, I grew fond of the carts in Zuccotti Park.  9/11 wiped them out and then, Occupy Wall Street.  Politics aside, please step away from my prole $5 falafel habit.

I don't know how they are made around the world and I confess, I never had them in Paris.  I've read that most falafel is made with fava beans but it seems the ones around here are mostly the chickpea variety.

We are lucky enough to live near this place (Salah Edin, please get a website. Also make more kibbeh and eggplant salad, you guys never make enough). 

Falafel also works surprisingly well around this house.  It's super cheap (!) and for the kiddies it's round AND deep fried.  It's also really easy to make fresh.

I generally riff when I make falafel.  The recipe I use the most for proportions is Mark Bittman's from The New York Times.  I really like his the best because of the baking soda -- it makes everything just a little bit lighter and the texture works well.   Also the spices: coriander and cumin are key (for me, at least) for falafel.

Second Pulse.  See the final texture?

For falafel, I will go ahead and soak the whole bag of Goya beans chickpeas. Since I don't have a giant food processor, I'll pulse the beans once, pulse the onions and the garlic separately, and process everything together with the spice and alternating tablespoons of water and lemon juice until the consistency is right.


You can fry right away or put in the fridge for awhile.

I like yogurt-tahini sauce.  Mine's pretty simple:  couple garlic cloves mashed up with salt, 1 part tahini, 2 parts plain yogurt and thin with lemon juice.  You can add cumin if you like.

I fry my falafel in a FryDaddy electric fry bucket.  I know, you're all jealous of this glamorous $17 kitchen appliance.  I mold them to around golf ball size.


And here we are.  We had only 5 left after dinner!  It's a very kid approved meal, served with pita and carrot sticks (and cucumber salad for the grownups.)

Friday, March 8, 2013

Red Sauce


When I was a kid, red sauce was everywhere. Every holiday:  Christmas, Easter, Thanksgiving.  Every Sunday. Every funeral, communion and baptism was celebrated at a red sauce joint with flocked wallpaper and some smelly old man playing "Volare" on an accordion. The grownups would drink bad chianti and my cousins and I would make sculptures out of butter packets.
 
In fact, our red sauce joint was so authentic, the parking lot even landed a role in a famous movie:

Is "Layla" playing in your mind?

There is a long history to Italian American red sauce with meat. It really is its own thing, invented by immigrants who wanted to show off and be as generous and lush as possible.  There are regionalisms throughout the states and individual traditions. It's a standard story that people going back to the Old Country for the first time are taken aback that red sauce isn't red sauce "over there." 

People will tell you that red sauce is bolognese. IT IS NOT. This is bolognese:


See? It's dry and carroty with a lot of wine. Or, rather, this is bolognese:

 
This is red sauce:
 
 
Here's the thing. Your kids don't want to hang out with a prickly, self-absorbed director with existential angst. Your kids want to take a ride with Uncle Paulie, knock over a 7-11 and go to AC for the weekend. Uncle Paulie has his merits. 
 
I didn't eat red sauce for years. Couldn't take it, couldn't stand the sight of it. Then I started itching for it, now and again. It does have its purpose. It's cheap as hell, freezes great, always dependable and always ready for action.
 
Now, there are as many variants as there are stars in the sky. Written recipes usually specify San Marzano tomatoes hand-nutured by the Blind Sisters of Saint Fiammentina and oregano dried by the Adriatic breezes. Great. We're going with whatever's 5/$5 this week at the supermarket. I usually buy a selection of whole tomatoes and crushed.  Because the tomatoes, my friends, are not the key ingredients.
 
These are:


Yup, pork neck bones. I've read that the faint of heart will use pork chops.  C'mon now.  Don't waste a decent piece of meat when all you need are bones and crap. 

The sauce has three layers: top, middle, foundation. The top flavor is going to be the tomatoes and the spice, the middle is going to be the ground meat and the wine, and the foundation is neck bones. It doesn't taste the same without it, it has no depth, it's weak, it's not substantial.

(ETA:  Ms. Texas reports that pork neck bones are not readily available in her nabe. Pork knuckles are an authentic alternate, I should've mentioned that before. Knuckles are used in some houses, I grew up with neck bones.  It's a house-to-house variant). 

Now, I add another ingredient to my base. You thought the neck bones were bad? Ha ha ha ha ha.


Oh, yes, chicken livers. I am sparing you the interior view.  A couple, diced, is going to make that foundation really strong.  Add a smokey wonderfulness. Just another shade. It's worth it. Yeah, I eat foie gras too when I can get it. Liver is magic. It's just going to melt away in the sauce.

So this is how we start.  All the neck bones, a couple diced livers and a couple pounds or so of ground meat (sometimes I buy the pork/veal/beef blend -- sometimes I add extra ground beef, whatever you're feeling) go into a giant pot to be browned.
  

Diced onions, celery, pulverized carrots and about 5-6 diced cloves garlic go in after.  A few bay leaves. A few teaspoons of oregano. Then a cup to a cup and a half of white wine.  When all that cooks out, you add your 5 cans of tomatoes and tomato variants. 

This is a mid-simmer shot.
 
If you want sausage, you can add that too.  I would advise from past experience not going too nuts on the hot sausage. This is going to be simmering for hours and the hot will make the whole sauce substantially spicier. 

Finalmente!
This is an all-day sauce.  You know you have sauce when it's brick red and the meat is falling of the bones. 

Red Sauce

5 cans of tomatoes, a mix of whole and crushed
4 tbsp olive oil
2 medium onions, diced
4-5 sticks celery, diced
5-6 carrots, pulverized
6-8 garlic cloves diced
1 package of pork neck bones
2-3 chicken livers (optional, but do it!)
1 lb ground beef
1 lb beef/pork/veal mix
Bay leaves
3 tsp dried oregano
1/4 tsp dried red pepper flakes
1 cup white wine, or red, you know, if it's opened

1.  Add all meat to a giant pot.  Brown well.

2.  Reduce to low-medium heat and add diced celery, onions, carrots, garlic and olive oil.  Mix, and then add  4-5 bay leaves and the oregano. Add the red pepper flakes. Stir for a few minutes and add wine.  Let all the wine cook out.

3.  Add tomatoes. Whole can be put through a food mill, a food processor or smashed at random with a potato masher in the sauce.  Your choice.

4.  Keep on a low flame for the whole day. Stir and taste often. Contemplate life. Read a poem. Take out the trash.

5.  After 5-8 hours, the melange will become Sauce.  It will be brick red and the meat will be falling off the neck bones. Taste, add salt and additional oregano as you like.

6.  The sauce is shockingly dependable frozen, I remove the bones for easier storage.

Tuesday, March 5, 2013

Chicken Croquettes, Buttermilk, Biscuits and Narcolepsy

With chicken croquettes and buttermilk gravy on my mind, I had planned to write a long post about making and using roux. But then I decided to add Texas’s Sunday Morning Biscuits and frankly, you need to make them NOW. They are life-changing. I’ve made a lot of biscuit recipes, and most of them sucked, requiring self-rising flours and fridge time.

My wayward Yankee heart has seen the light and will go forth to sin no more.

But onto chicken croquettes. My children have a wide and varied palate, as long as whatever it is you are cooking is rolled into a ball and deep fried. I tried making chicken croquettes because I can sneak in a SPOT of vegetable – celery, carrot, onion – and they gobble them up. I usually start with a grocery store roasted breast for a few bucks. You can poach your own chicken if you want. First I obliterate my vegetables with the food processor and the chicken right after until it’s pasty and smooth.

Then I make my roux. In case you’ve never made one before, roux is butter (or another fat, but we’ll talk about that later) and a few tablespoons of flour mixed over low heat (And never browning and NEVER burning). When it’s crumbly and together, you add a cup or so of HOT (not burnt, but def hot) milk and whisk the hell out of it over low heat. You keep going until it’s looking like vanilla pudding or mayonnaise.

I started making roux many years ago when I got it into my head that I had to know how to make a soufflé. And believe me, I fucked it up many many times. The hot milk thing is a Julia Child trick, I’ve rarely seen it mentioned anywhere else. But the roux pulls together much quicker. A roux is the basis for a million things. Once you master this it’s only a few steps to a soufflé, or béchamel, or mac and cheese – anything, really.

This is the finalized roux, with the addition of nutmeg and salt/pepper.


Then the pulverized chicken and my roux (I folded in some egg yolks into it as well) is folded together. I threw in some bread crumbs (too many frankly) and put in the fridge until go time. I decided to roll these in egg and more breadcrumbs anyway. Anything to get the kids to eat.

When I was speaking to Ms. Texas about my project, she suggested using the oil I used to fry for the basis of a buttermilk gravy. Which sounded fine – but I use canola for the safety/higher flashpoint – and canola doesn’t have a lot going for it tastewise. I decided to use a little bacon grease for my second roux for the gravy. This was my first time making a roux without butter (just the bacon grease and a little of my canola) and it took a lot longer to pull together, even with the addition of hot buttermilk. Since my band is not as fond of milk and cream as I, I decided to add a little chicken broth to mix. Probably added too much, didn’t cook down as quickly as I would have liked.


But the biscuits, did I mention the biscuits? HEAVEN. No lie. Amazing. And here was our dinner. The children were thrilled and my eldest actually remarked that “the food was good.”

OMG, what did you say? Oh, right, I guess I should’ve made a vegetable. Oh well.

My croquette recipe is adapted from something on the internet. I'll try to find it and post.

The evening ended with us all quiet on the couch, each playing "Temple Run" on our respective mobile devices, incapable of thought or conversation.  Carb/dairy/fat trifecta achieved.
Blogging tips